Installing or replacing your Motorola VIP2102 set-top box
- Front Panel Lights/Function
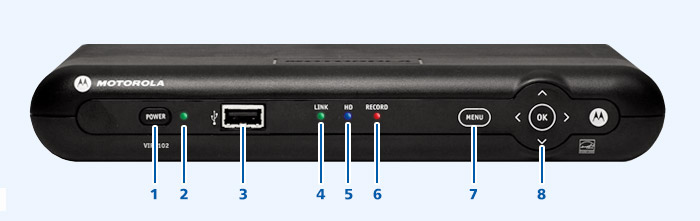
Key Item Function 1 POWER Switch - Press quickly to turn the set-top box on or off.
- Press and hold for 10 seconds to perform a full restart.
2 POWER LED - Green: Power is on.
3 USB USB 2.0 port (Not compatible with Bell MTS service). 4 LINK Green: Connected to the Bell MTS TV network. 5 HD Blue: Set-top box is receiving an HD signal. 6 RECORD Red: PVR is recording one or more shows. 7 MENU Displays the on-screen menu. 8 UP/DOWN/LEFT/RIGHT/OK - Arrows allow you to navigate the menu.
- OK selects/accepts channel and menu options.
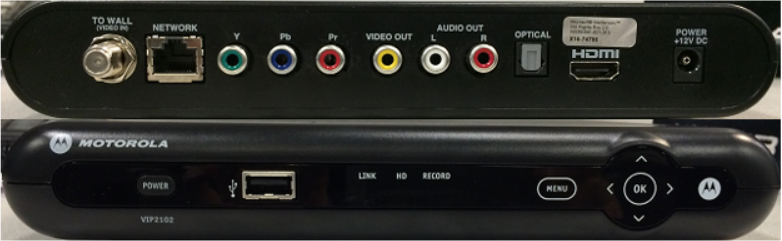
- Rear Panel Function
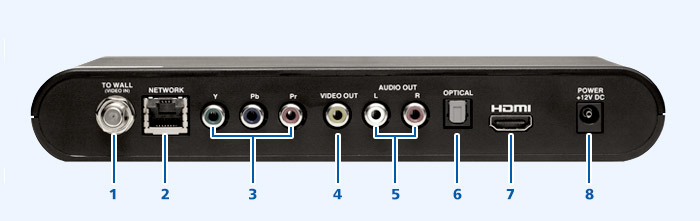
Key Item Function 1 TO WALL (VIDEO IN) Coaxial input from the 2Wire or Pace Residential Gateway to the set-top box. 2 NETWORK Ethernet 10/100 Base-T RJ-45 port. 3 Y PB PR RCA-type component video outputs to an HD-TV or home theatre receiver. It carries video only; you must also connect to the TV or home theatre receiver for audio. 4 VIDEO OUT RCA-type, standard-quality video output (to a TV, VCR, DVD recorder, or other device). It carries video only; you must also connect to the TV or home theatre receiver for audio. 5 AUDIO OUT L & R Stereo audio outputs (Left and right RCA-type). 6 OPTICAL S/PDIF output. High-quality digital audio output (to a digital home theatre receiver). 7 HDMI High-Definition output. Connects to an HD-TV or home theatre received with an HDMI input. 8 POWER DC power adapter connector. - Finding the MAC Address
You can find the MAC address on a sticker on the bottom of the unit.

- How to replace your VIP2102 set-top box with a VIP2102 set-top box
- Disconnect all cables from your current set-top box and connect them to the corresponding connections on your new set-top box. If you have a coaxial connection, a wrench or pliers might be required to loosen the coaxial cable.
- If you have a USB device plugged into the front of the set-top box for your RF remote, ensure that you transfer it over to the new set-top box.
- Note: Do not plug in the old power adapter to the new set-top box.
Images may not be exactly as shown. 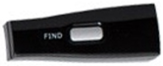
RF USB Receiver
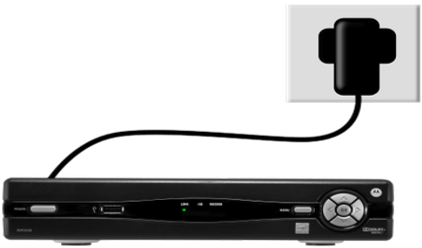
Images may not be exactly as shown. - Once you have connected the set-top box to a power outlet, the lights on the front of the set-top box flash. The set-top box will take several minutes to load up.

Images may not be exactly as shown. - Ensure your TV is set to the correct input (HDMI1, HDMI2, Video1, etc.)
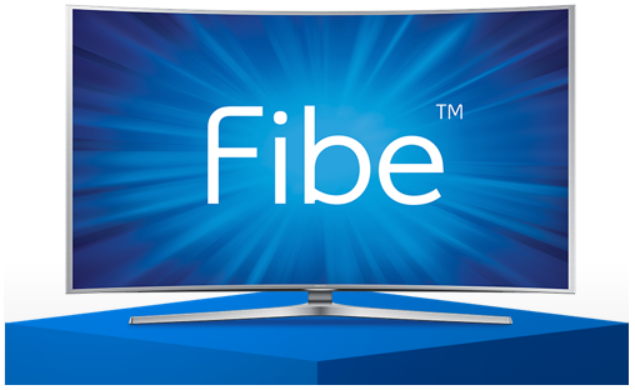
- The Fibe TV logo will appear on your TV screen when it is ready for use. Press SELECT or OK to watch TV.
Images may not be exactly as shown.
- Disconnect all cables from your current set-top box and connect them to the corresponding connections on your new set-top box. If you have a coaxial connection, a wrench or pliers might be required to loosen the coaxial cable.
- How to replace your VIP1200 set-top box with a VIP2102 set-top box
- Disconnect all cables from your current set-top box and connect them to the corresponding connections on your new set-top box.
- If you have a USB device plugged into the front of the set-top box for your RF remote, ensure that you transfer it over to the new set-top box.
- Note: Do not plug in the old power adapter to the new set-top box.
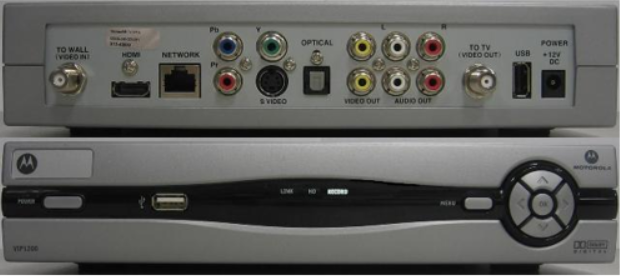
(VIP1200)
Images may not be exactly as shown.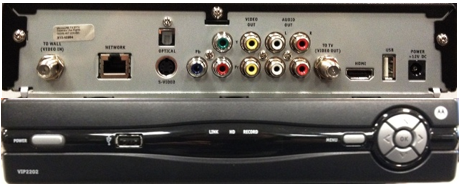
(VIP2102)
Images may not be exactly as shown.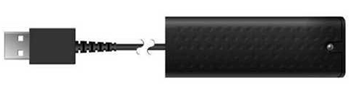
RF USB Receiver
Images may not be exactly as shown. - Once you have connected the set-top box to a power outlet, the lights on the front of the set-top box will flash. The set-top box will take several minutes to load.
Images may not be exactly as shown. - Ensure your TV is set to the correct input (HDMI1, HDMI2, Video1, etc.)
- The Fibe TV logo will appear on your TV screen when it is ready for use. Press SELECT or OK to watch TV.

Images may not be exactly as shown.
- Disconnect all cables from your current set-top box and connect them to the corresponding connections on your new set-top box.