The Weather Network App
Note:
This application requires a subscription to MTS High Speed Internet. The Weather Network App is NOT customizable under MyRemote.
-
Tune to channel 16 (Weather Network SD) or 1016 (Weather Network HD) and press OK to start.
-
An iTV button will appear within approximately 3 seconds. Press OK.
After approximately 30 seconds, the iTV button will disappear. Tune away and tune back to channel 16 or 1016 in order for the button to reappear and to enter the app.
General How to Use
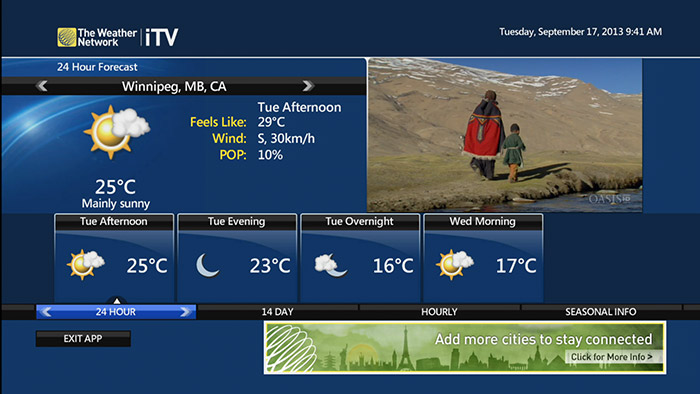
- How to Access the 24 Hour Forecast
-
-
On the Main Menu, use the arrow buttons on your MTS Remote to navigate to 24 HOUR. The next four time segments will be shown (Evening, Overnight, Morning, Afternoon).
-
Use the arrow buttons to highlight to the next segment, and the right or left arrows to navigate through the segments for the additional information to change.
-
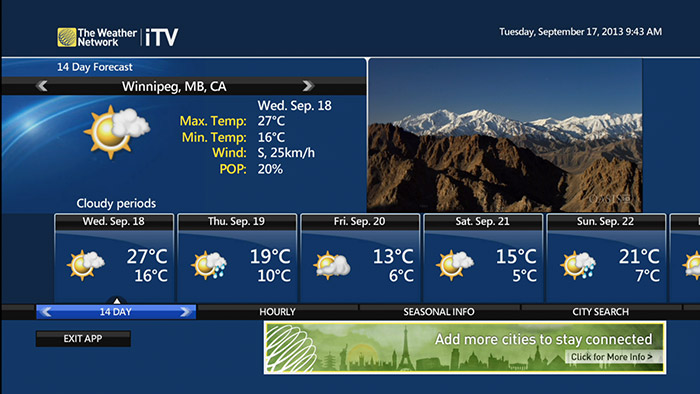
- How to Access the 14 Day Forecast
-
-
On the Main Menu, use the arrow buttons on your MTS remote to navigate to 14 Day. The next 14 days will be shown.
-
Use the up arrow to highlight the next day, and the right or left arrows to navigate through the days for the additional information to change.
-
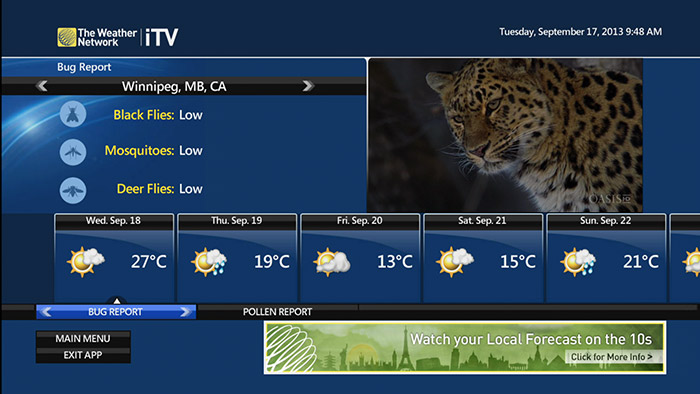
- How to Access Seasonal Information
-
-
On the Main Menu, use the arrow buttons on your MTS remote to navigate to SEASONAL INFO.
-
Use the up arrow to select BUG REPORT or POLLEN REPORT and press OK. Cycle through future Bug Forecasts using the right or left arrows.
-
Use the up arrow to highlight the current City.
-
Use the right or left arrows to cycle through your saved cities for Seasonal Info on that location.
Note:
The location must be one of your Saved Cities in order to see Seasonal Info about it.
-
Use the down arrow to highlight MAIN MENU and press OK.
-
- How to Send Feedback Pelmorex Media Inc. (The Weather Network)
-
-
On the Main Menu, use the right arrow to navigate to FEEDBACK.
-
Scan the QR Code on the screen with a smartphone.
-
Send an email to the address that appears.
Note:
This is not sent to MTS, but rather to the provider, The Weather Network (Pelmorex Media Inc.).
-
You should receive email confirming your feedback was sent.

-
- How to Exit the App
-
-
On the Main Menu, use the down arrow to highlight EXIT APP and press OK; or, press the EXIT button on the remote control. You can also exit the app by changing channels using your remote control.
Note:
The Back button on your MTS TV will not work for this.
You cannot tune to a different channel while in this application, you must exit first.
-
Settings
- How to Change Your Settings
-
-
On the Main Menu, use the arrow buttons to navigate to SETTINGS.
-
Use the up arrow to highlight REORDER CITIES, REMOVE CITIES, UNITS OF MEASUREMENT or CHANGE DEFAULT CITY and press OK.
-
After selecting one of the options, use the right or left arrows to navigate through the other options under SETTINGS.
-
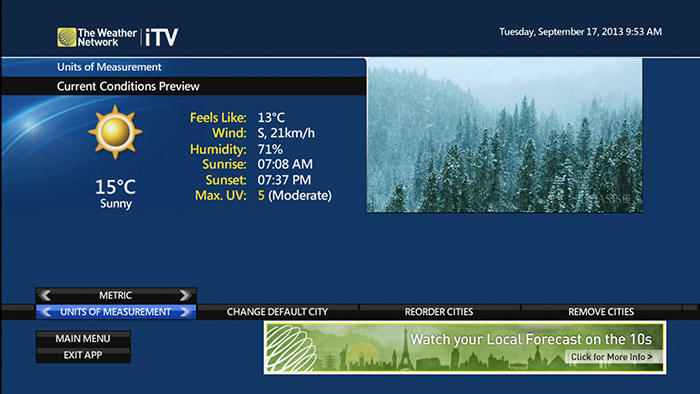
- How to Change Units of Measurement (Metric / Imperial)
-
-
On the Main Menu, use the arrow buttons to navigate to SETTINGS.
-
Use the up arrow to highlight UNITS OF MEASUREMENT and press OK.
-
Use the up arrow to highlight METRIC and the right / left arrows to highlight IMPERIAL.
-
Use the up arrow to navigate to SAVE CHANGES.
-
Use the down arrow to highlight MAIN MENU and press OK.
-
Managing Your Cities
- How to Add or Search for a New City
-
-
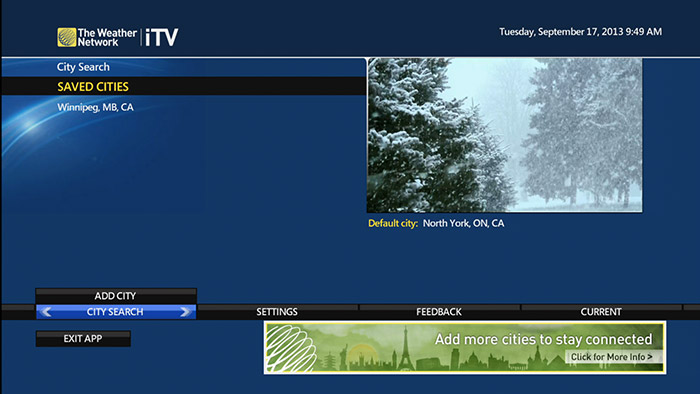
On the Main Menu, use the arrow buttons to navigate to CITY SEARCH. The list of Saved Cities will appear.
-
Use the up arrow to highlight ADD CITY and press OK.
-
Use the arrows buttons and the OK button to select your letters in the search box. Select a city and press OK.
-
When you are prompted to SAVE CITY press OK.
-
- How to Reorder Cities
-
-
On the Main Menu, use the arrow buttons to navigate to SETTINGS.
-
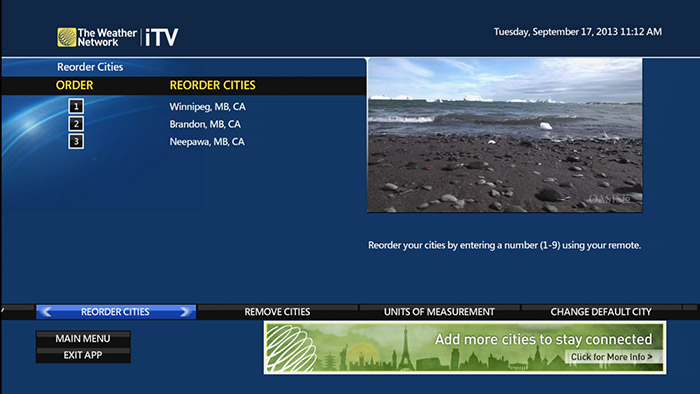
Use the up arrow to highlight REORDER CITIES and press OK.
-
Use the up arrow to select a location from the list of Saved Cities.
-
Press the numbers 1-9 on the remote depending on what order you want the cities to be presented. For example in this screenshot, if you want to reorder Neepawa to be the 2nd listed city, appearing before Brandon, navigate to Neepawa and press the number 2 on your remote, and navigate to Brandon and press number 3.
-
Highlight SAVE CHANGES and press OK.
-
Use the down arrow to highlight Main Menu and press OK.
-
- How to Remove Cities
-
-
On the Main Menu, use the arrow buttons to navigate to SETTINGS.
-
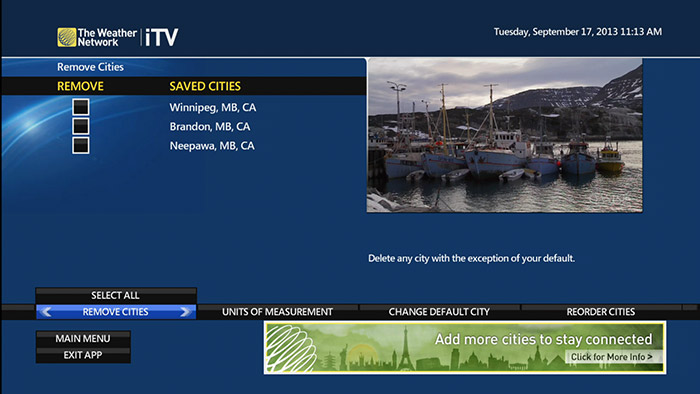
Use the up arrow to highlight REMOVE CITIES and press OK.
-
Use the up arrow to highlight Select All and press OK; or, use the up arrow to highlight city list, navigate to the desired city and press OK.
-
When you are prompted to Save Changes press OK.
-
Use the down arrow to highlight MAIN MENU and press OK.
-
- How to Change Default City
-
-
On the Main Menu, use the arrow buttons to navigate to SETTINGS.
-
Use the up arrow to highlight CHANGE DEFAULT CITY and press OK.
-
The user's list of Saved Cities will populate.
-
Use the up arrow to navigate and highlight your desired city and press OK.
-
When you are prompted to SAVE CHANGES press OK.
-
Use the down arrow to highlight MAIN MENU and press OK.
-